![]() Make a border
Make a border

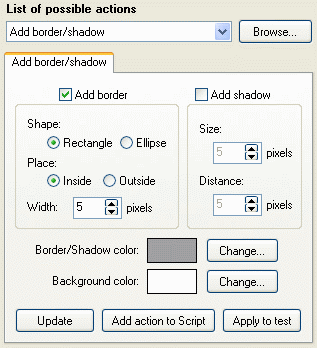
You can make a border (shadow) to your images at the 2nd Step of the program by using "Add border" action. With this action you can add color border or shadow to your images. The form of the border can be rectangle or ellipse. Placing border inside your image you will replace image's pixels by the border color. Placing border outside your image you will have it right behind your image. Making shadow to your image specify its size and distance that means interval between right-down corner of initial image and right-down corner of its background.
Make a border (shadow) to a singe image.
If all you need is to make a border (shadow) to a single image, load it as test image (press "Load" at test image part at the right), make border (shadow) and use "Apply to test".
To return to the initial image look use "Retrieve" or "Undo last" to take off the last applied action.
When you double click the image the full test image window opens.
If you have tested all the values of the action you can now save your sample image as BMP, JPG, GIF, PBM, PGM, PNG, PPM, TGA, TIF by using "Save As.." button at test image part at right.
Make a border (shadow) to a many images at the same time.
Choose your images at the 1st Step, add them to your File List. Then test the way you would like to edit your images at the 2nd step as said above and add the action "Add Border" to your script. Specify saving parameters at the 3rd step and press "Start".
See also: